HOW TO ATTRACT AND HOLD MORE DEER ON YOUR PROPERTY (Step by step guide)
Kenny Miller
 Have you ever wondered if there is a way to attract and hold more deer on your property? That is precisely where we found ourselves about six years ago.
We had just acquired a piece of property that had areas within the property that naturally held some deer, but there were also quite a few areas that were underutilized. I will share with you some of the tools and methods we used to improve habitat and food sources that, in turn, created a vast increase in the overall deer herd and in the mature bucks the property held.
These are methods geared towards those of us that want to get the most out of our smaller acre properties. This can range from a couple of hundred acres to thirty acres or less depending on how the property is laid out. Most of these methods are achievable on a relatively low budget.
This article is more of a general overview of things you can do to make your property more attractive than your neighbors. If you want more in-depth information on specific methods, I will have links in the description that will breakdown those in greater detail.
Use your knowledge of the property and utilize topographic maps and aerial photos to come up with a game plan that meshes everything together to maximize the potential of the property.
Food Sources
Create food plots. Food plots are probably the most utilized tool used by hunters and for obvious reasons.
If you have food, the deer will come, even more so in areas that don’t have a lot of ag fields and other sources of food other than natural browse. They will use food plots to get necessary nutrients and proteins that help nourish lactating does with fawns and will boost buck antler growth.
Food plots can be big or small, depending on your goals. If your property allows it, you can plant food plots from one to five acres or more and supply year-round nourishment for your deer herd. You will be able to attract and hold deer longer if you can do so. Plant different mixes that will mature at different times of the year, so you keep nutrients there year-round
However, some properties will not allow you to have bigger food plots without having someone come in and clearing a big patch of land, and that’s ok.
You can plant smaller food plots ranging from a quarter acre up to an acre and you will attract deer. The smaller your food plots are the more you risk the deer clipping everything to the ground before it reaches maturity. It is still an excellent attractant used to bring deer onto your property, especially during the fall and winter months.
There are a ton of resources out there to use when deciding what kind of food plot will work best for you. If you want more in-depth analysis and the type of food plots we create, clink on here Food Plot Guide.
Plant fruit trees. Deer will hammer fruit once it has ripened! Most fruit is as close to candy as a deer will ever get.
You will have a hard time finding a better natural attractant than ripe fruit, and it will create a significant edge over your neighbor if he doesn’t have any fruit trees.
Once the pear tree on our property started dropping fruit, we had pictures of every single buck on our property at that location. It is a great way to draw in deer to a specific area on your property.
They are also a great source of energy for the deer going into the winter.
Fruit trees do take work to nurture and maintain, and you want to do your homework before you take on this task. You must make sure you plant trees that can thrive in your planting zone. I promise you, once they start dropping fruit you will reap the rewards tenfold!
You will have the most success planting multiple types of the same species of trees so they can cross-pollinate and in turn, bear more fruit. I recommend at least three trees of the same species planted together for the best success rate.
Check out this great guide for planting fruit trees on your property by Mark Olis.
Supplement Feed. Feeding the deer corn, soybeans, apples, and other food sources are great options for drawing deer to your property. However, it can be one of the more expensive methods of drawing in deer year-round.
You see, you are not only feeding the deer, but you are also feeding all the raccoons, squirrels, opossums, and birds that live even remotely close to your feed site. Especially if corn is your food source.
You may not think these other species will take a lot of the feed, but I have had up to twenty raccoons on camera at a single site at the same time. This makes a huge difference in the amount of feed that is consumed.
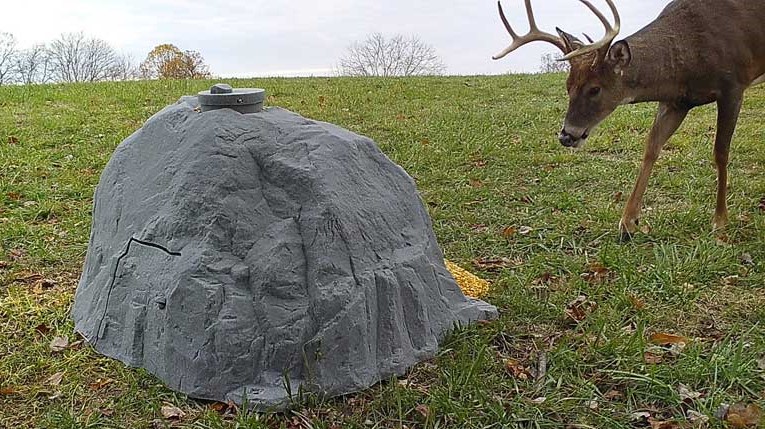
One solution to the problem is, start using a feeder that has a timed release and will only release a small amount of feed twice a day. It will lessen the food eaten by raccoons as they are mostly nocturnal feeders.
It will also train the deer to be on their feet during the day, so they get to the feed before it is gone. The problem with most timed deer feeders is, (a) their release is loud (spooking deer), and (b) they are bulky and very unnatural in the environment. Your does and small bucks might visit during daylight hours, but most mature bucks will wait until nightfall to approach the feeder.
There are several things to keep in mind when feeding corn. If you hunt in areas where deer don’t have access to big corn fields and aren’t exposed to corn year-round, you should consider only starting corn supplementation in Spring to Fall.
Here’s why: deer are ruminants. When ruminants ingest a large amount of low-in-fiber carbohydrates (corn) that they aren’t used to, their stomach lacks the microbial bacteria to break down the corn.
This can cause something called Acidosis in the deer. Acidosis will result in dehydration and in some cases death. If you start feeding corn in the spring through fall deer will have other browse in their diet and they will have a much easier time digesting it.
If you want to start feeding corn but it is in the winter season, you can use a timed-release feeder and slowly introduce corn to their diet (three to four pounds a day). A deer’s gut flora will take about three weeks to get used to the change in the diet and then you can slowly ramp up your feeding.
I recommend feeding a supplement that has non-gmo corn, soybeans, and other grains. These provide a well-rounded diet of fat, protein, and energy.
The supplement we use also has probiotics, microbials, and Ionic minerals that aid in rumen health, and digestive system intake. This will boost fawn health, increase milk quality, and grow those big antlers we’re after.
Create Mineral Sites. Mineral sites might be one of the most significant ways to create an edge when it comes to improving the overall health of the deer herd and growing those big antlers everyone is after! (IF YOU PROVIDE THE RIGHT MINERAL!)
Feeding minerals year-round is great for your overall herd health and it is especially crucial to supplement with mineral during the 200-day antler growth cycle if you want your bucks to reach their genetic potential!
More hunters are using deer mineral than ever before; however, there is a misconception that most deer mineral is created equal. When looking for a quality deer mineral, look for minerals that are in Ionic form and not Colloidal form. Most deer mineral will be in Colloidal form unless listed on the package or label as an Ionic form mineral. An Ionic form mineral is more expensive, and therefore most companies opt to use Colloidal form mineral in their products.
Colloidal form minerals need to be broken down into Ionic form by the deer’s stomach acid to be absorbed. At the maximum, only between 10-15% of it can be broken down into Ionic form and absorbed by the deer.
Ionic minerals, on the other hand, are already broken down, and 90% or more can be absorbed by the deer depending on the mineral needs of that individual deer. We further break down the difference of both forms of mineral and why you should be feeding your deer Ionic form mineral in our Growing Bigger Bucks article.
Another big thing to look out for in your mineral is a high salt content. Salt is an attractant for deer, especially in the spring, when their potassium and water intake from the green forage they are consuming is high.
Salt is a cheap filler, and deer are attracted to it, but it doesn’t provide them the complete minerals they need to promote antler growth and overall herd health.
Always check the ingredients list on mineral products before you spend your hard-earned money. You should look for mineral products that have a maximum of 50% salt. If the mineral has a higher salt content than that, they are an attractant, and if your goal is to get deer in front of a trail camera, it will work perfectly fine.
Keep in mind; the salt will provide almost no valuable nutrients and minerals that will aid in antler growth and overall herd health.
Calcium, phosphorous, and selenium yeast are all ingredients you should also look for in your mineral products along with other trace minerals.
The particle size of your mineral determines the availability of that mineral to the deer. Ionic minerals will be in the smallest particle form so naturally, they are in the ideal form to provide the most nutritional availability to the deer.
Products containing these ingredients (especially phosphorous and selenium yeast) may be the more expensive options. Still, if your goal is to build bigger antlers and promote herd health, it is worth every penny.
The number of mineral sites you should put out will vary from property to property depending on what your deer population is and what their mineral intake has been up to this point. A general rule of thumb is one mineral site per 40-45 acres. You may need more sites per 40 acres if you have a higher deer population that hasn’t had any mineral supplementation.
Place your mineral sites strategically where the deer will locate them quickly. These sites can be close to a food or water source and between bedding areas and a food or water source.
If you are using a mineral block you can place them on the ground almost anywhere, just make sure it isn’t on a hillside as it will move around more easily as the deer move around it.
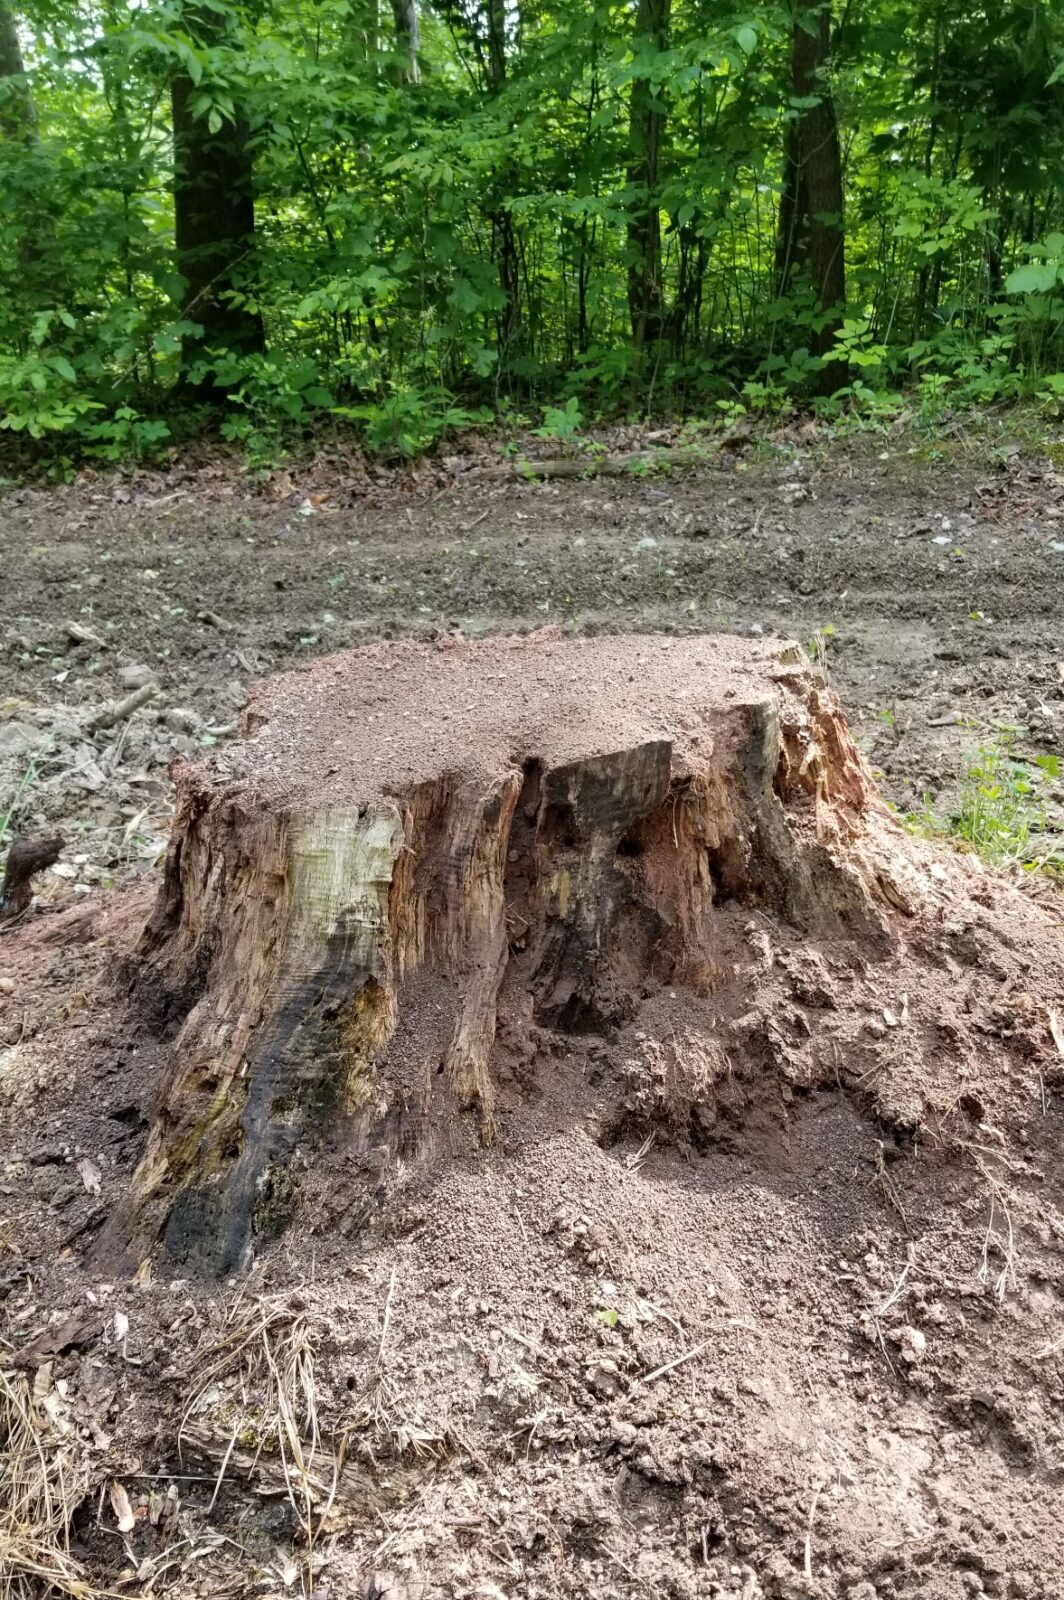
For loose mineral, I like to pour it on stumps, logs, rocks, and even on bare ground if you don’t have those other options. If you pour on stumps and logs, they will eventually tear them up going after the salt and mineral. Make sure your mineral site is in a dry well-drained area.
Pour it out onto areas anywhere from two-by-two feet up to four-by-four feet and watch the magic happen once the deer get started on it.
Make sure you follow your state regulations regarding mineral sites.
TIP: When you change to a different mineral product, mix in the new mineral product with the old mineral so the deer will have a chance to get used to it. Slowly phase out the old mineral over at least three months. I’ve switched to a quality mineral in the past that had less salt content than my previous mineral. It took about six months until they were completely used to it, but then they started hitting it as hard as other higher salt content minerals. Stick with it and your deer herd will benefit.
Habitat
Create a thick cover. Deer prefer not to move around in open woodlots with little to no undergrowth where you can see a far distance. These are often referred to as “park effect” woodlots.
Add a variety of bushes, pine trees, or perennial long grasses throughout any open timber, large fields, and staging areas that you want to break up and create more cover. Plant these in any open areas that are between the bedding areas and the food sources. Also, consider adding more cover between doe bedding areas as the bucks will cruise these corridors looking for hot does during the rut.
We have planted thousands of pine trees over the years on our properties. We have found, they are fast-growing and great ways to break up large fields.
Switchgrass is a great option when it comes to perennial long grasses. Keep in mind they will take a little weed control their first year and can take three seasons to reach maturity. It will reach eight to ten feet at maturity and provides the perfect cover for travel corridors and staging areas.
When planting shrubs, consider using shrubs that provide additional browse for the deer. There are many species you can plant, and you can ask your local nursery what they recommend for your area. Make sure you don’t plant any invasive shrubs that will take over your property and become a nightmare to deal with.
You can also harvest some mature timber or low-value timber. Harvesting timber will let sunlight through the canopy onto the ground and will promote undergrowth and saplings will also start to grow, thus breaking up the open “park effect” woodlots. Keep the fallen treetops in the woods providing browse and cover for the deer.
When you do harvest a large amount of timber in the same area, make sure you cut and maintain trails through the undergrowth that will start growing because of more sunlight reaching the ground. Keeping trails open will allow the deer to travel through, and you can guide them in the direction you want them to go.
You have multiple options when it comes to select harvesting and clear-cutting your forest. Make sure you are comfortable with the choices you choose, as most of these decisions are not easily reversed (especially not in your lifetime).
Have untouched sanctuaries. Leaving areas of your property completely untouched is essential. You can go into this area to retrieve deer, but in general, you want to completely leave it alone. You can designate five to ten acres for this but the bigger area you can leave alone the better your ability to hold deer will be. Use the area that is the nastiest, thickest, hardest to get to, and leave it completely alone. It’s as simple as that.
When a mature buck starts feeling hunting pressure on the neighbor’s property, guess where he’ll go? Where he knows he has never had a human encounter.
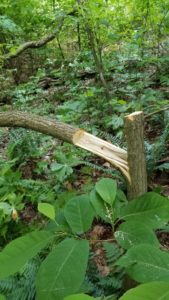 Hinge cutting for deer cover. Hinge cutting is done by cutting about halfway to three-quarters of the way through a small tree allowing it to fall horizontally about waist high but leaving enough cambium layer (the growing part of the tree) intact. When done right, the tree keeps living and provides cover for years to come. I like to use trees ranging from 3-8 inches wide, and I usually make the cut on the tree trunk between 3-5 feet off the ground.
Use hinge cutting to create cover and bedding areas by cutting two or more trees, so their tops end up together after you have strategically hinge cut them. Use low-value trees and trees that are crooked when possible, so you don’t waste any valuable timber for the future. Check out the area thoroughly and make sure your treetops will end up close to where they’re supposed to.
Hinge cutting can be used to create deer funnels and will guide them in the direction you want them to go. Deer and especially mature bucks do not prefer traveling through open woods that don’t provide cover. Deer want their cover to be from the ground to five feet high.
Figure out the corridor you would like the deer to travel and hinge cut trees along the path on both sides. Have the corridor be about 8-10 feet wide where you can.
Hinge cutting is something that has been underutilized and can do a lot to improve your ability to hold more deer on your property.
Create deer bedding areas. Buck bedding and doe bedding areas, in general, look completely different.
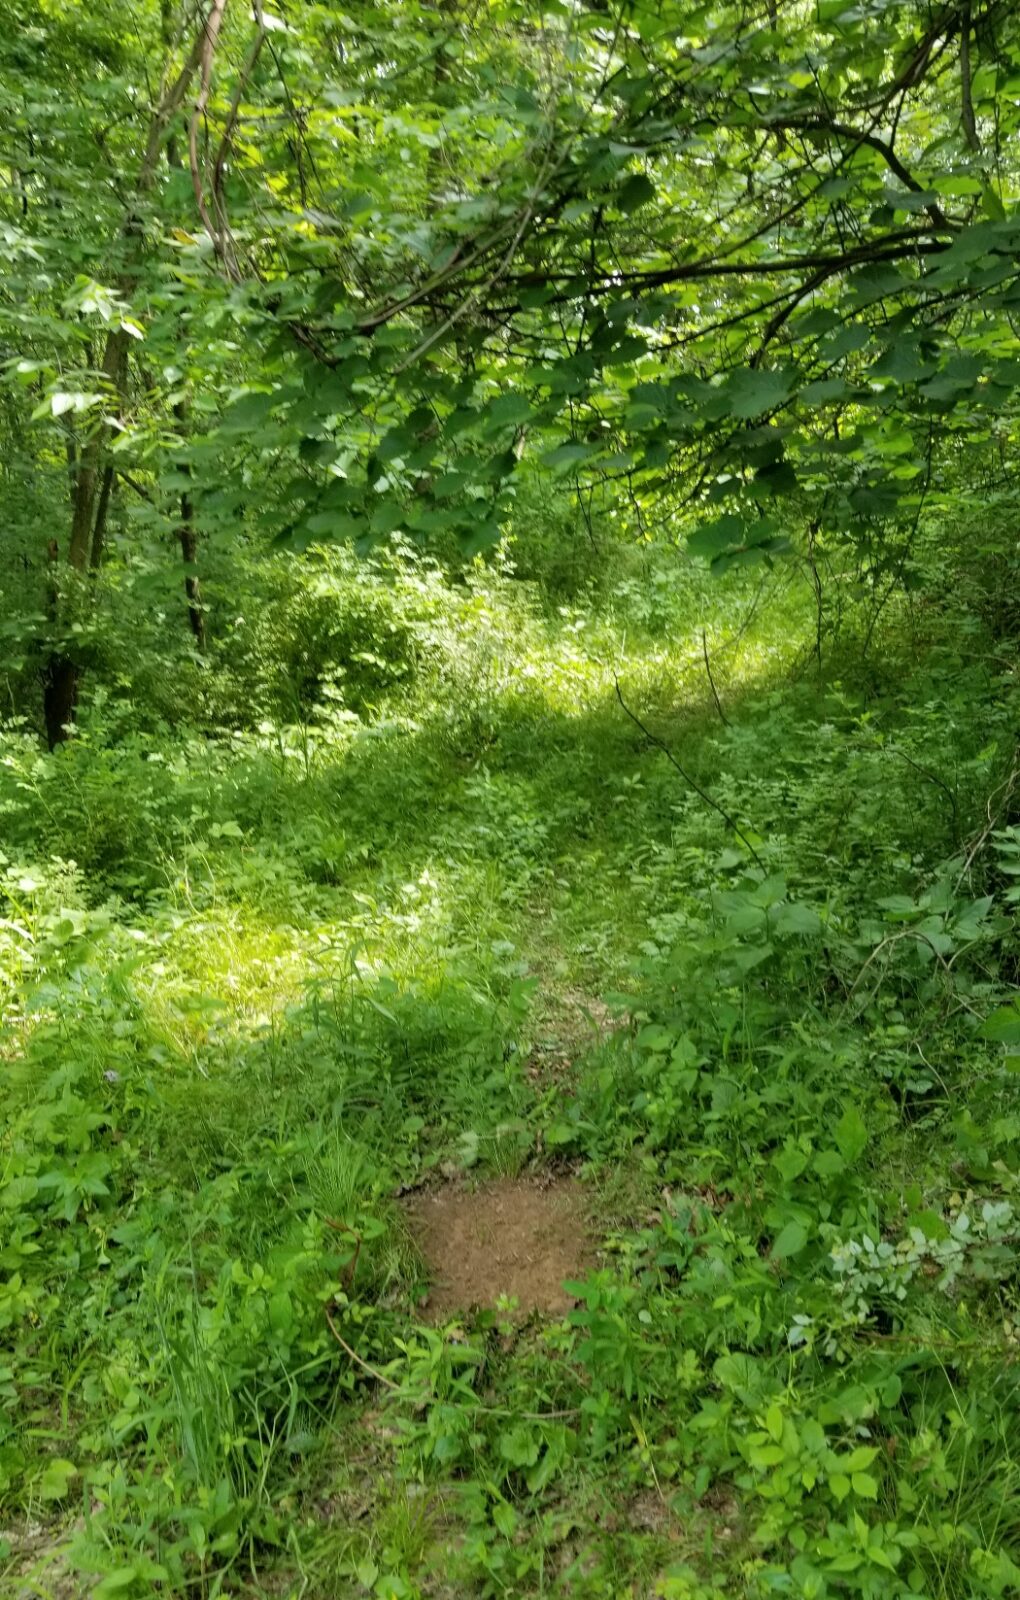
Strategically create bedding areas so you can ambush the deer when they travel from their bedding area to their destination, food, water, etc. If you have thick impenetrable cover in an area you want to put beds in, cut several paths through the thick cover, and deer will start traveling through there and will use the beds once they locate them.
To make the deer beds, clear an area about 3×3 feet using your spade or hoe. Make sure it is in an area that stays mostly dry. Deer will not bed in mud if they have any other options. Clear out all the rocks and any sticks bigger than a pencil. Use your tools to clear the debris and make the bed level if needed.
Deer will bed almost anywhere if they need to, but the more appealing you make their beds, the more deer you will have using them.
Think of it like this; would you rather stay at a clean 5-Star hotel with 1000 count sheets or stay at a 1-Star hotel that has a bed with a lumpy mattress to offer. Deer will pick the more comfortable bed every time, providing the cover and other factors are the same.
Bucks prefer to bed in the higher elevation of the area in which they are spending their time. These areas can be on a bench, end of a ridge, and in a low-lying swamp, it can even be on a dry hump that rises a little higher than the rest of the area.
They prefer having their back to thick cover. You can hinge cut trees to create the cover or use existing blowdowns. Steep rock faces are also a great option. Mature bucks will bed alone, so only clear one bed.
Does are more likely to bed in groups and will even bed in tall grass in an open field. They are also more likely than a mature buck to bed anywhere in the woods that has a little cover.
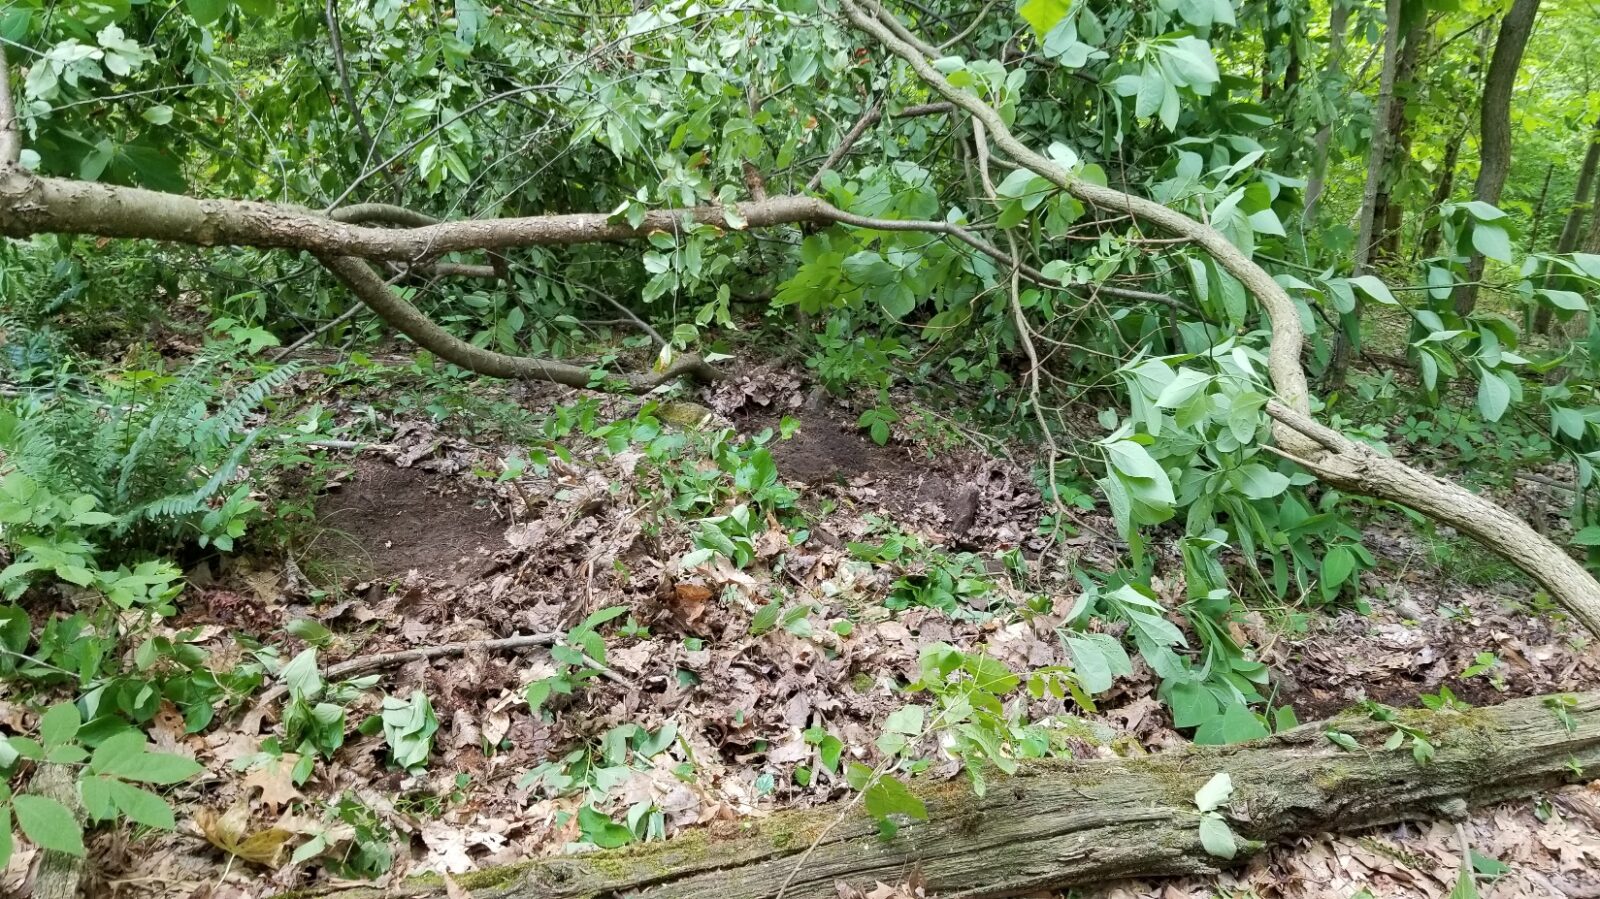
I like to make my doe beds up against blowdown treetops, downed logs, and hinge cut trees. I will make up to 5 or 6 beds in the same area if I have the proper amount of coverage. The other thing to keep in mind is the deer needs at least two directions it can escape out of if it needs to.
Making doe bedding areas along with putting a food plot in a couple of hundred yards away, has been one of my most successful ways of attracting and holding more deer to a specific area of the property. I went from seeing deer maybe every 2 to 3 hunts in one area and only seeing the occasional buck cruising the ridge in the fall, to seeing 6-10 does every hunt and the buck movement during the rut improved immensely as a result.
Bedding areas and food plots are a great one-two punch and are some of the first things I like to focus on when it comes to attracting and holding more deer on a new property. They work hand in hand to increase the herd on the property and will produce results almost immediately.
The best times to create bedding areas are right after the season is over up until early summer. You will leave a lot of scent in the area, and we like our property to settle down and have the deer find the bedding areas well before your hunting season starts.
I wrote another article Creating Deer Bedding Area that has all our strategies when it comes to creating bedding areas. Feel free to check it out for more tips
Tip: Strategically place a couple of different doe bedding areas so you can hunt between them, keeping your access point and prevailing winds in mind. Bucks will cruise from one doe bedding area to another looking for hot does once the rut comes around. This will lead to more exciting encounters and successful hunts.
Create water holes for your deer. If your property already has plenty of natural resources of water, you don’t need to worry about adding any more sources.
However, if you have no water on your property or maybe a small creek that dries up late in the summer, adding water will make holding deer on your property easier and checks another box when it comes to pulling deer from the neighbors.
You have multiple options when it comes to creating water holes on your property.
One option is digging a hole and putting a tank or trough into the hole. When using this method, make sure your tank is at least 75 gallons. I recommend using something that holds between 100-120 gallons. Anything less than 75 gallons will almost definitely go dry at some point in the year.
When digging the hole, make sure you dig deep enough so the whole tank is entirely below ground, or the deer will be less likely to use it. If you can submerge it an inch or two below the surface and taper the area around the tank, you will collect more water runoff when it rains. After the tank is in the hole, put a layer of dirt on the bottom of the tank to mimic a more natural water hole.
You can fill your tanks with water and see if you need to replenish them or if rainwater can keep them topped off.
I had a tank get pushed above the surface when the ground froze. When this happens, take out the tank when the water is close to empty and dig out the hole before placing the tank back into it.
If you have a small creek running through your property, but it dries up when it doesn’t rain for a while, you can dig a pool somewhere along the creek. We dug one along our creek that was 10 feet by 10 feet and 25 inches deep below the creek bed. Make sure to taper in the ground surrounding the pool, so the deer have easy access. You can dig out the pool with a shovel if you’re up for some hard-manual labor, but a tractor with a bucket works excellent and will make your life easier.
For the best results, you want to line the hole with a heavy-duty tarp to hold water better. Cover the tarp with 4-6 inches dirt to keep it in place and to make it appear more natural for the deer.
You can use this same process anywhere on your property to collect and hold rainwater. You can opt to fill it with another water source or let mother nature take its course.
You will want to take a rake and clean out leaves and other debris from your water source about once a year to keep them relatively clean.
TIP: Place a branch that reaches from the top to the bottom of your water tank. Doing this will allow rodents and small animals that fall into your water hole to climb out.
You must start using scrape lines (mock scrapes!)
If your goal is to see more mature bucks on their feet during daylight hours, pay attention to this next method.
 A mature buck will spend 70% (in some cases even higher) of his daylight hours bedded down. Once peak rut starts that will change obviously. If you want that buck on his feet and on your property during early season daylight hours, you must do something that will alter his patterns.
One of the best ways is to do this is by building a line of mock scrapes along well-used trails. The more mock scrapes you create, the more you will have different bucks using them for marking their territory by spreading their scent on an overhead (licking) branch via their nasal, preorbital, and forehead gland and then urinating on the worked-up scrape. I have made up to 30 mock scrapes on a single scrape line. In the well-traveled corridors they will use up to 80 % of the ones I created.
Having that mature buck know he has mock scrapes that will likely have another buck’s fresh scent on it will absolutely drive him crazy. He will be on his feet more during daylight hours and that will allow you more opportunities to have encounters with him.
In my experience mature bucks like to clean out scrapes in early to mid-morning and in the evening. I have been most successful hunting over a scrape line in the first couple of hours in the morning.
Once you have figured out where the travel corridors are that your deer travel through a lot, you can start building your mock scrapes. Keep your stand location and the prevailing winds in mind when you are deciding where to have your scrape lines.
Building mock scrapes can be as simple as taking a hoe and clearing a 2×2 feet area below some overhead branches until you are down to bare dirt. Then, just trim the branches with hedge clippers so they are five feet high (or shoulder height.)
If you don’t have any branches hanging directly over your bare dirt, or they are higher than shoulder height, there are several other methods you can use to make your mock scrapes.
One method we do is to use long-lasting parachute cord and tie it towards the end of the overhanging branch, then we pull down on the overhead branch until it is the desired height above the scrape before we tie off the other end of the line around the base of the tree.
 Another similar method we use when we can’t bring the overhead branch to the height we need by tying to the base of the tree is, we pound trap anchor cables into the ground to tie our cord to. We then place the anchor cable as close to the tree as possible, so the cord isn’t obstructing any of the travel corridors.
Then we use a steel rod or even an oversized screwdriver and a hammer to pound the anchor cables into the ground. Once we have driven it into the ground six or seven inches, we take our rod and put it in through the loop giving us a handle. Then we give the handle a quick tug until the anchor turns horizontal and is no longer able to be pulled out of the ground. We can then bring our branches down until they are the correct height and tie them off on the loop of the anchor cable.
Hinge cutting is another method to consider when you don’t have any branches you can reach to tie down. By hinge cutting the tree, you will bring down a treetop that you can trim to work perfectly for licking branched over the scrapes.
There is a secret tool in the industry that can be used alongside mock scrapes that will just drive those mature bucks mad! It involves a licking branch injected with scent wicks and a preorbital scent, however, I won’t get into it in this article for the sake of keeping this purely informative. If you want to learn more, I wrote another article that goes more in-depth with creating scrape lines and the use of these products that are essential tools in your arsenal this fall!
Create staging areas. Deer staging areas aren’t spoken of enough in the hunting industry. Knowing how a mature buck uses staging areas and how to identify or create staging areas will increase your odds of having encounters with those bucks.
A deer staging area is often a deer activity hub in thick cover close to a food source that gives the deer a complete sightline of the surrounding area. That staging area might be where the thicker cover in timber thins out into saplings and/or tall grasses. Typically, this area is between the bedding areas and the food source and will most likely overlook that food source.
Mature bucks want the advantage of sight, smell, sound, and a clear escape route before they commit to moving to an open food source, and a good staging area will provide all that.
Have you ever wondered why you can get trail cam pics of mature bucks in your food plots, but they’re right after the sun goes down? This buck will often come from his bedding area and will hang up in the staging area watching does feeding and waiting until close to dark before he comes out.
Never disturb a deer staging area. This area is used by all the deer in that area of the property to communicate and it is where they feel most safe when they are on their feet during daylight hours. Disturbing that area even one time can alter the pattern of the deer, and even push them out of that area.
It is not a good idea to hunt the actual staging area. Instead set up between the staging area and the bedding area where you believe a mature buck is bedding. This will allow you to encounter the buck while he is heading to the staging area and if he busts you, he may use a different route from there on but he will still end up going to the same staging area. Never hunt with your wind blowing towards a staging area. Save that hunt for another day when you get the correct wind.
If your property doesn’t have natural staging areas don’t worry. There are things you can do to create great staging areas for the deer.
You can begin by planting various shrubs inside open wood lines and in field edges close to food sources. You can also plant a tall perennial grass with the shrubs or plant the grass on its own on field edges. Make the staging areas be at least twenty-five by twenty-five yards if you have the room to do it.
I find that a mixture of both tall grasses and shrubs makes a great staging area.
In summary. There is no magic bean I can give you to plant that will mysteriously bring more deer onto your property. However, if you are willing to put in the effort and utilize some of the methods I’ve shared with you, chances are you will see an increase in your deer herd and in your encounters with mature bucks.
If you are already doing some of the stuff mentioned in this article, consider focusing on some of the things that you haven’t been doing.
If you are in the beginning stages of land management, this process may seem daunting. Do not worry!
Just focus on doing one stage at a time. It takes us a couple of years to get properties close to where we like them but anything you can do in the short term will immediately impact your deer herd.
I am by no means an expert in land management, but I enjoy working on our properties and trying to maximize their potential. I am always learning and trying to improve my land management knowledge.
Thank you for giving me your time and “Happy Hunting this year and every year!”
Common Questions:
Will I be able to do proper land management on a limited budget?
Yes, you can do a lot of the methods discussed on a limited budget. Especially if you’re willing to trade sweat equity for money.
I use a hoe, handheld double edge grass shear, and a chainsaw to do most of my habitat improvements. You can substitute a handsaw for a chainsaw if you like.
Your average food plots will cost you around $250 an acre with soil samples, seeds, lime, and fertilizer. This does not include the equipment needed to plant. However, you can make “Poor man’s food plots” for much less with less equipment.
Is it too late in the season to start implementing these practices?
It’s great if you can do most of the habitat improvements early in the year but it is never too late to implement some of these methods. You can create scrape lines, bedding areas, improve habitat, or put out mineral and feed sites. Try to minimize your impact on the area by finishing everything you want to do in one day. It helps to minimize your impact if you can check the forecast and make sure there’s rain in the evening after you are finished. The rain will wash your scent away.
What should I do first?
There is no easy answer here. It depends on what your property and the surrounding properties have to offer. Generally, the first things I do is add food plots and bedding areas if the property is lacking in those areas. This will bring deer onto your property and once they find the beds, keep them there longer. This gives you an opportunity to put the rest of these methods into practice. I normally follow that up with making several mineral sites to maximize the genetic potential of the deer herd.